Advanced Filtering
Advanced Filtering is a data filtering feature seen in conversions, which includes two types of filtering:
- Field Filtering
- Array Filtering
Field Filtering allows a user to specify which fields in an object should be included in the output data when creating a data mapping (conversion).
For example, let’s say you have an object called ‘Weather’ as shown below. In your output, you only want to show the temperature and location field from this object. Field filtering allows you to select which fields are needed for your output.
{
    “weather”: {
        “temp” : 25,
        “humidity” : 60,
        “location” : “Amsterdam”
     }
}
Array Filtering allows an array field in your input data to be filtered on based on defined criteria.
For example, let’s say you have an object array called ‘Weather’ as shown below. In your output, you only want to show the temperature if the location is Amsterdam. Array filtering allows you to define a filter based on the key you want to filter on.
{
    “weather”: [
        {
            “location” : “Amsterdam” ,
            “temp” : 25
        },
        {
            “location” : “Breda” ,
            “temp” : 30
        }
    ]
}
Configure Field Filtering
To configure or modify field filtering for your conversion, enter the ‘Data conversions’ page by clicking on the Data option in the menu screen.
To configure field filtering, you first need to create a conversion. Please refer to the Conversions Basics Guide
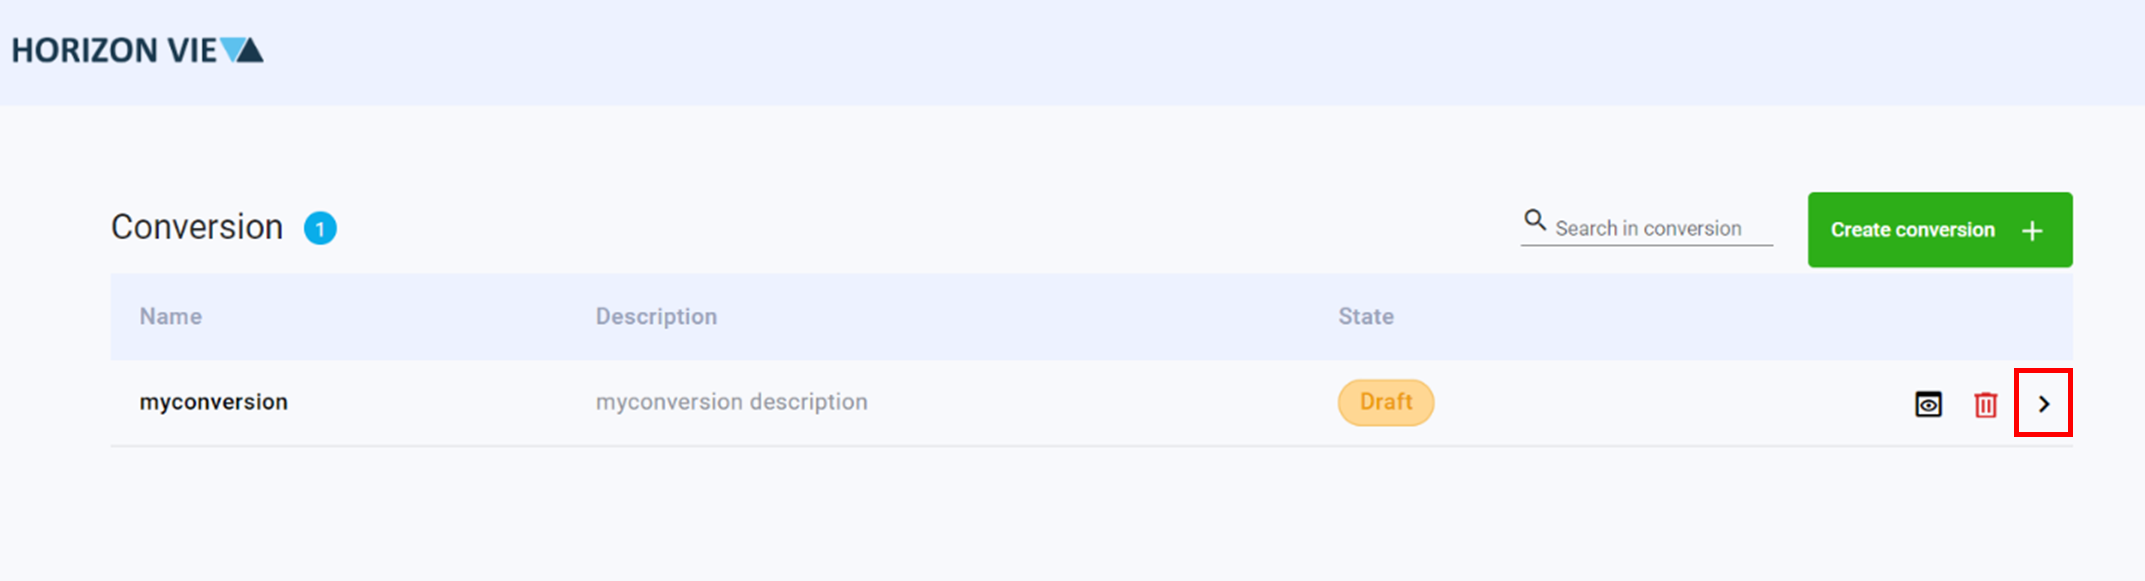
- Click on the arrow to enter the conversion design space
Drag and drop the required fields into the middle panel (Specifications panel)
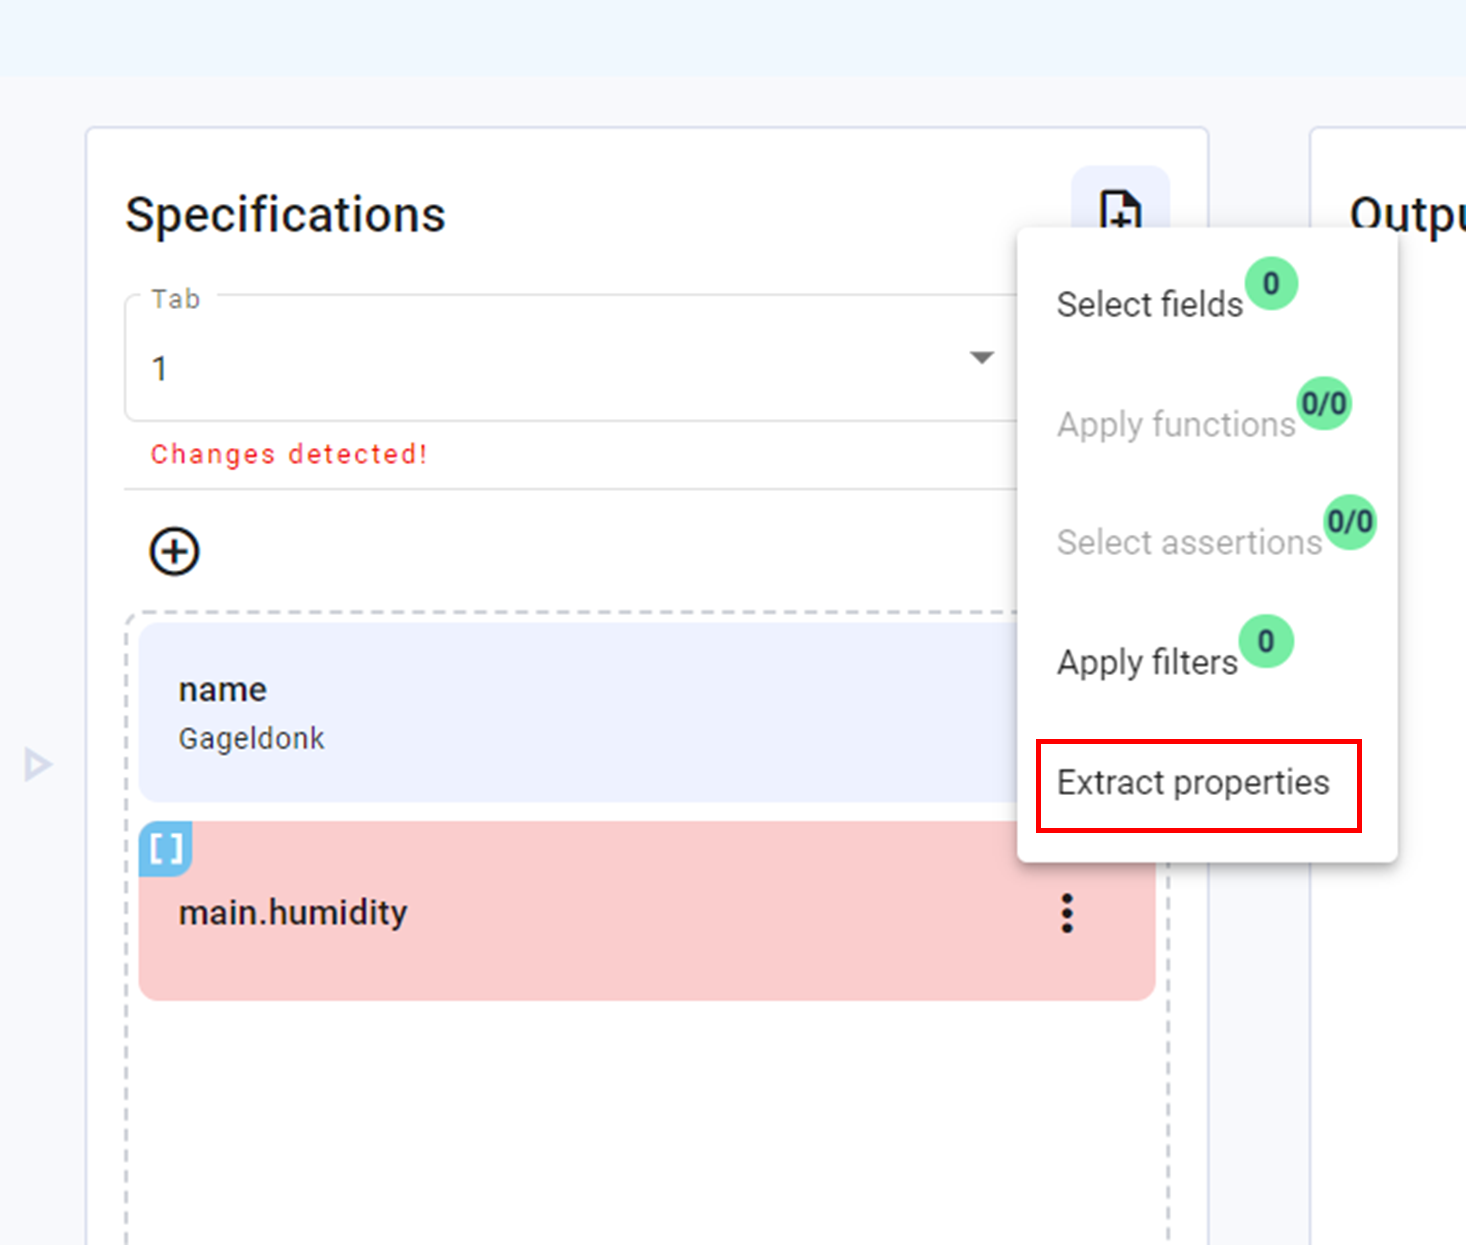
Click on the three dots of the dropped field in the middle panel

- Click on Extract properties
- Select the properties to be extracted
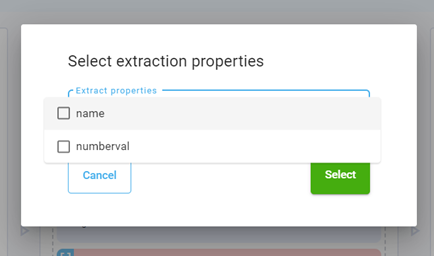
Click Select
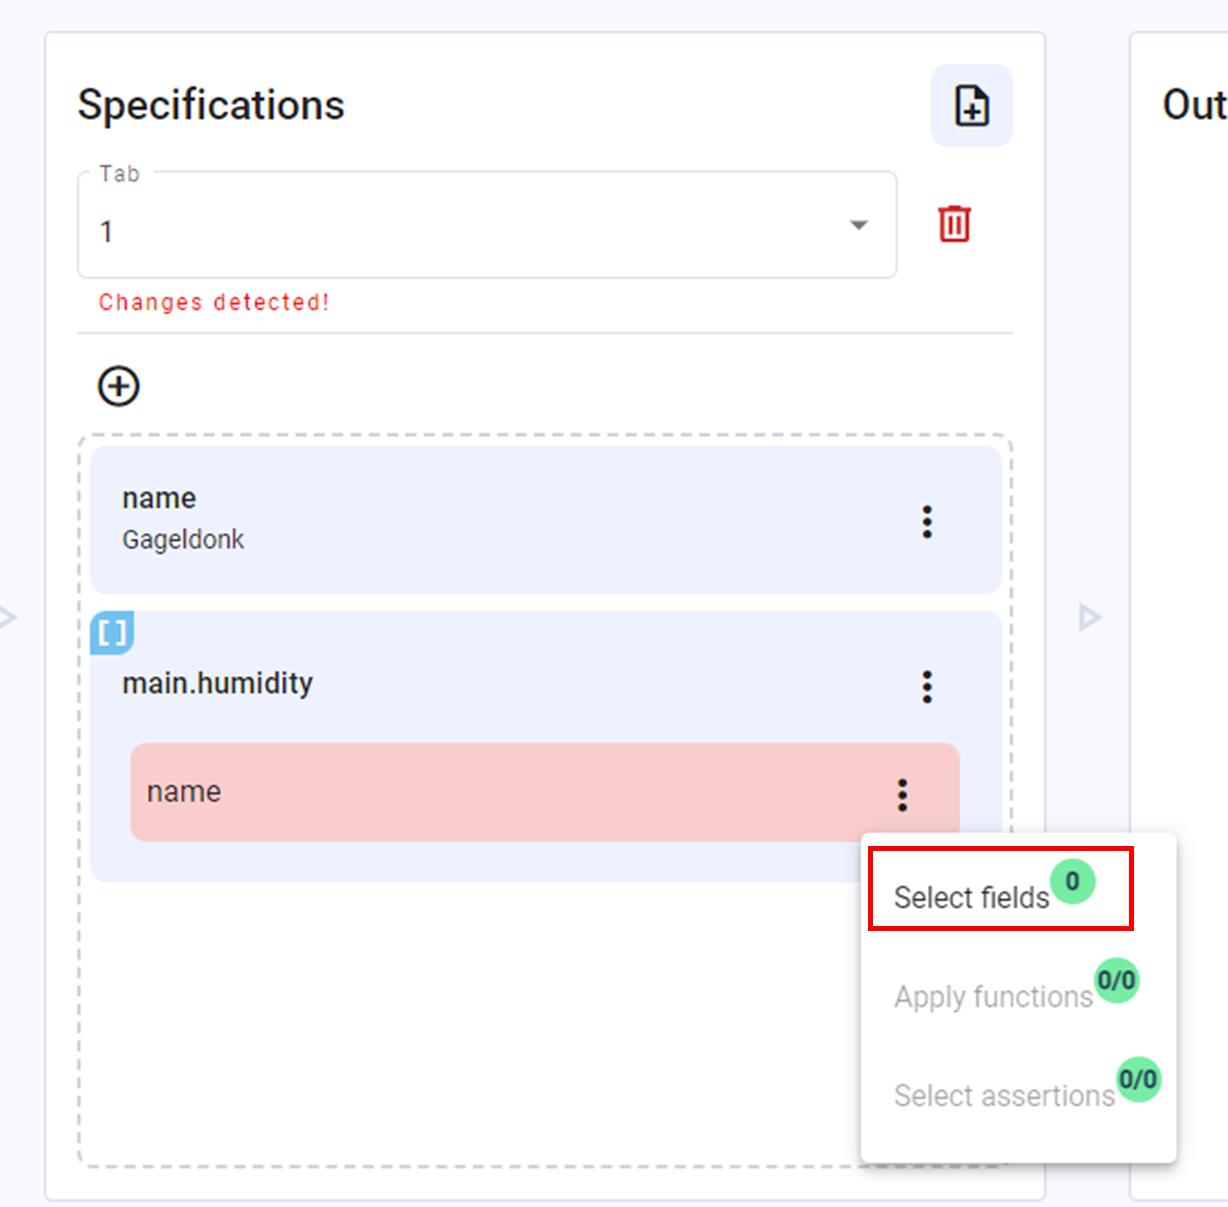
Click on the three dots of the extracted property
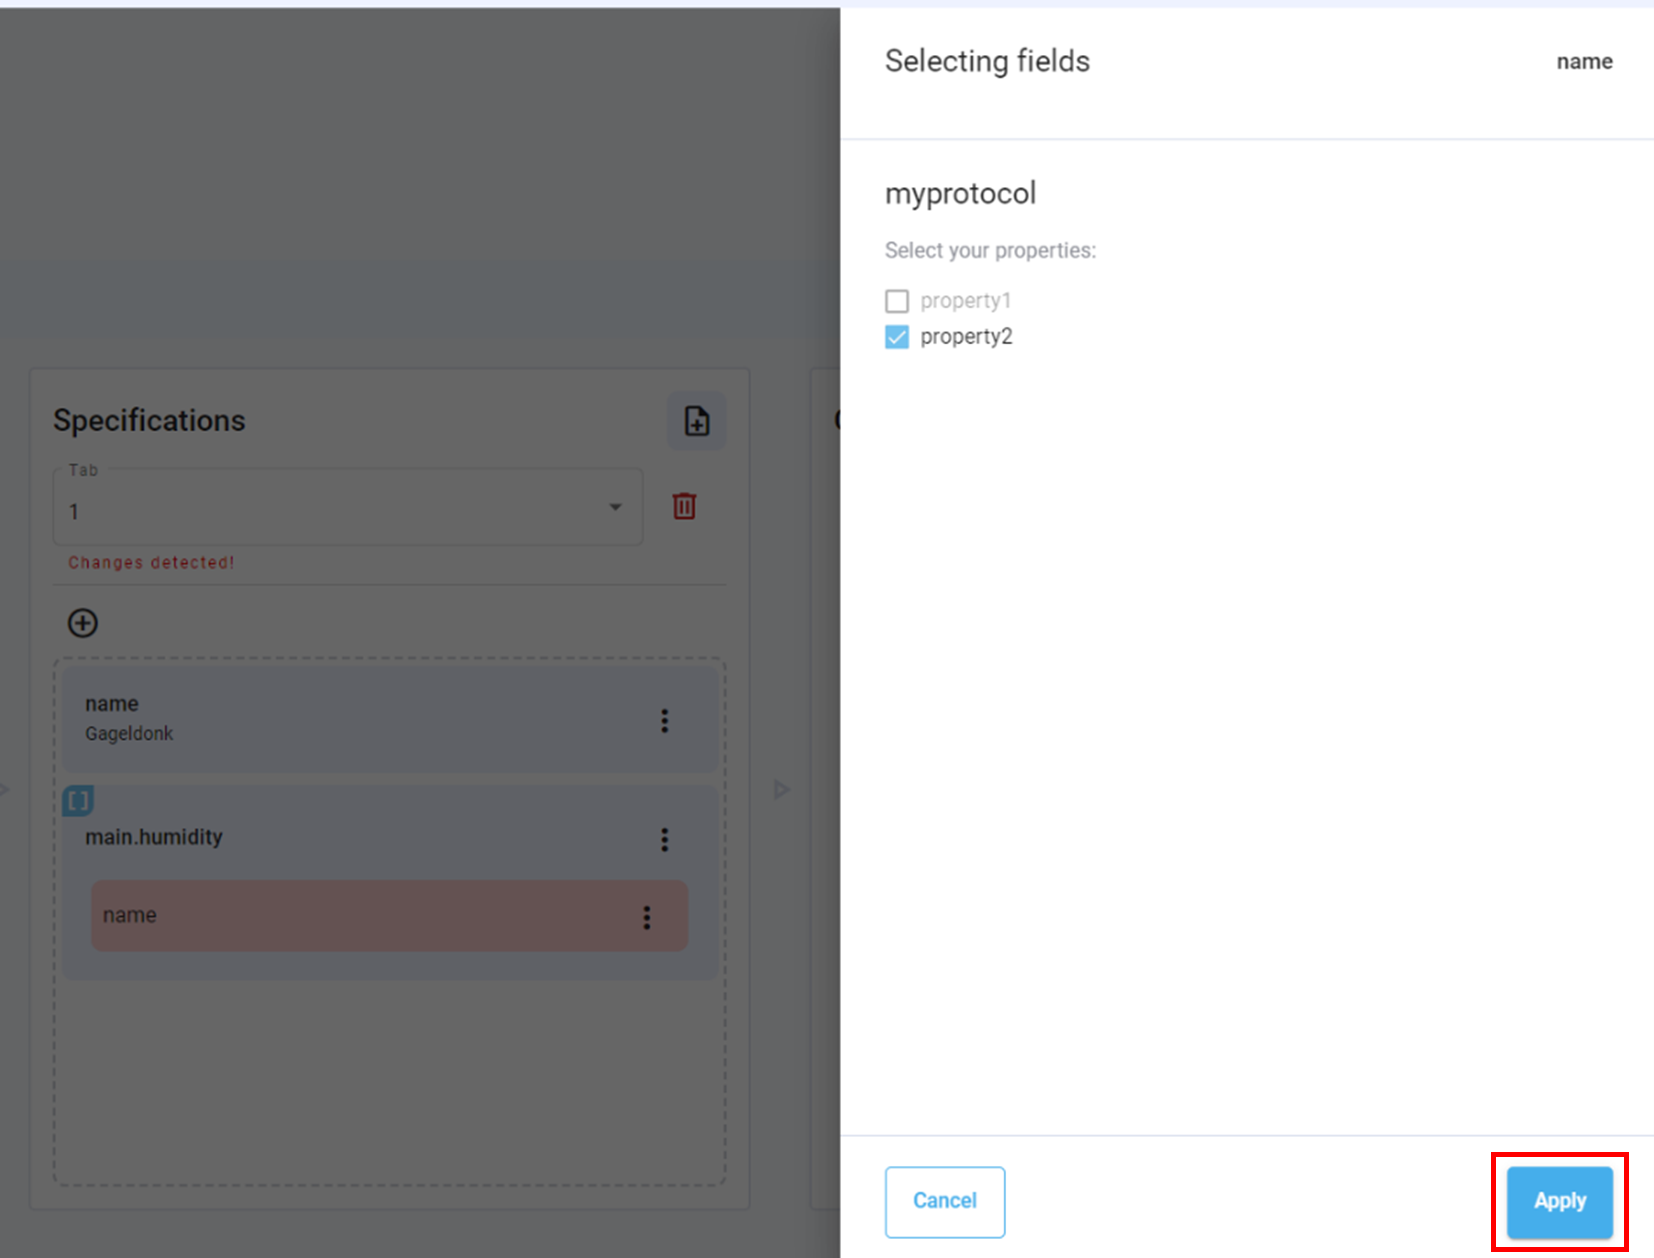
Click on Select fields
Select the relevant protocol property(s)
Click Apply
Configure Array Filtering
To configure or modify array filtering for your conversion, enter the ‘Data conversions’ page by clicking on the Data option in the menu screen.
To configure array filtering, you first need to create a conversion. Please refer to the Conversions Basics Guide
- Click on the arrow to enter the conversion design space

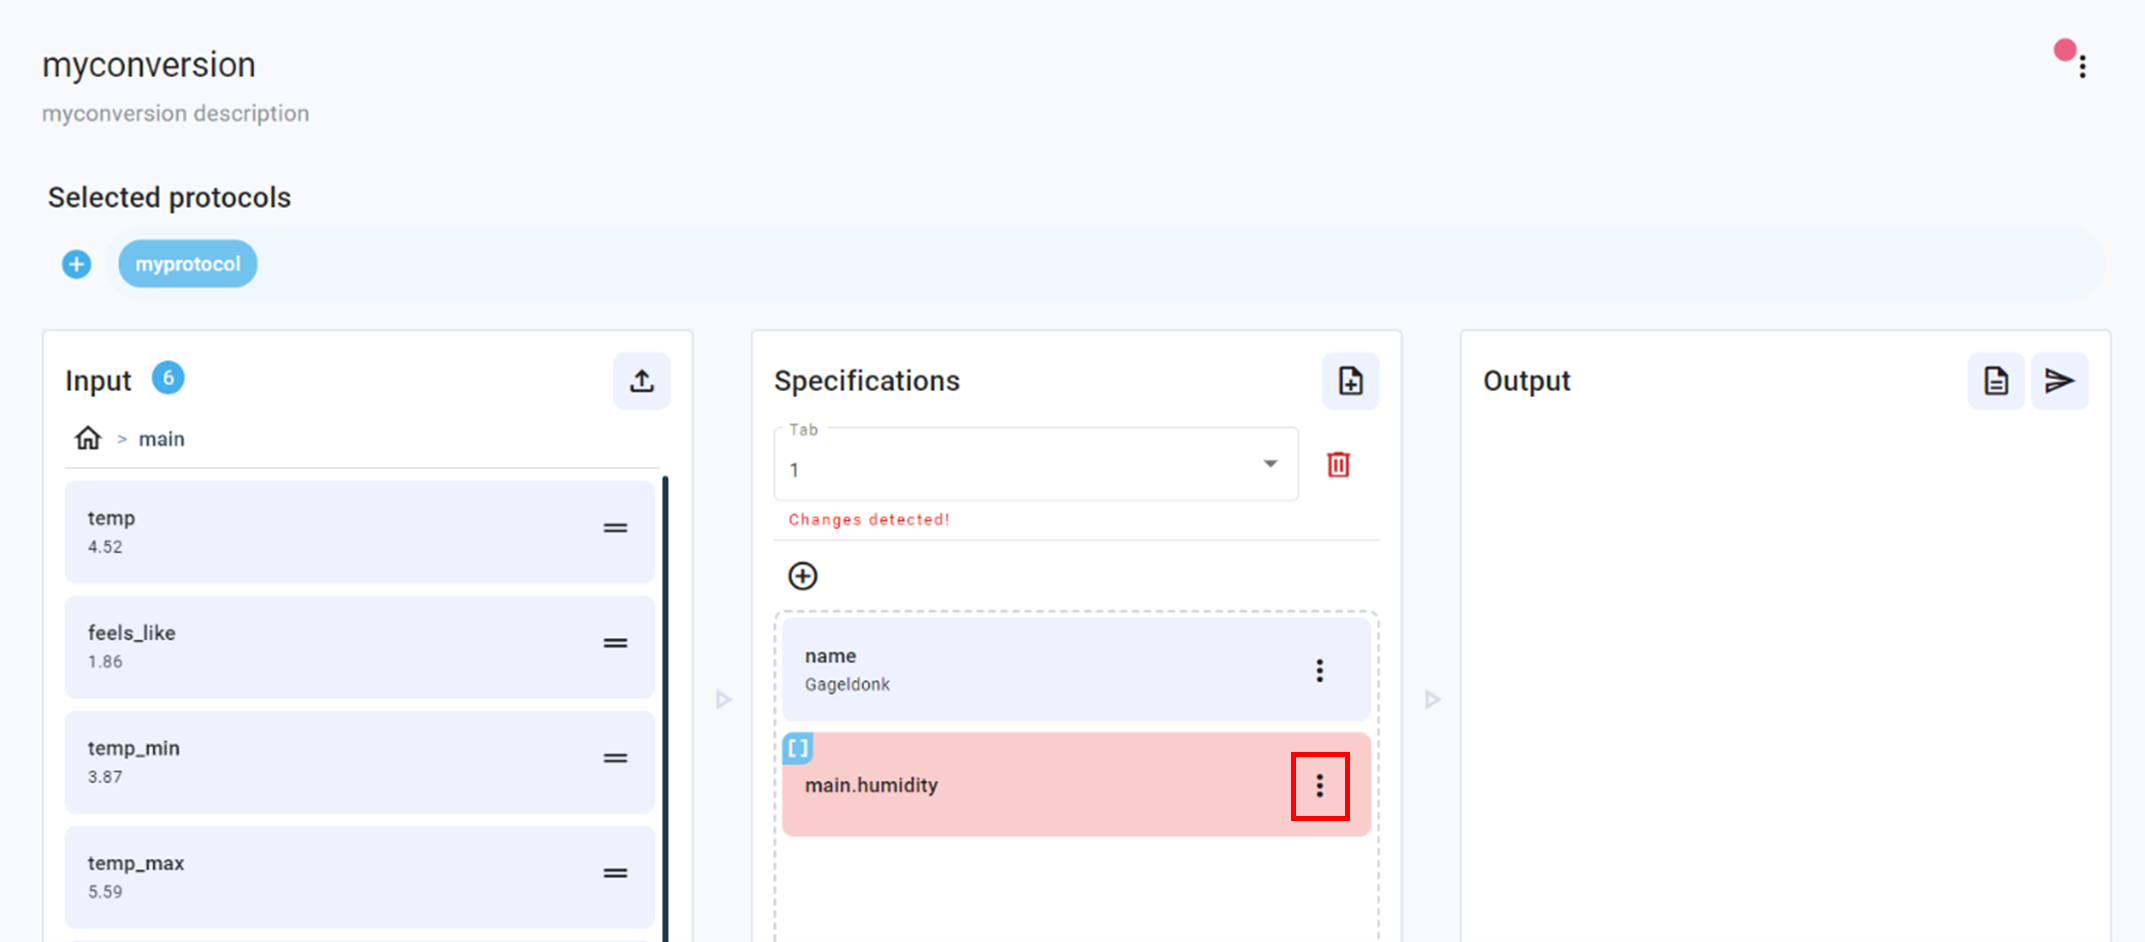
Drag and drop the required fields into the middle panel (Specifications panel)
Click on the three dots of the dropped field in the middle panel
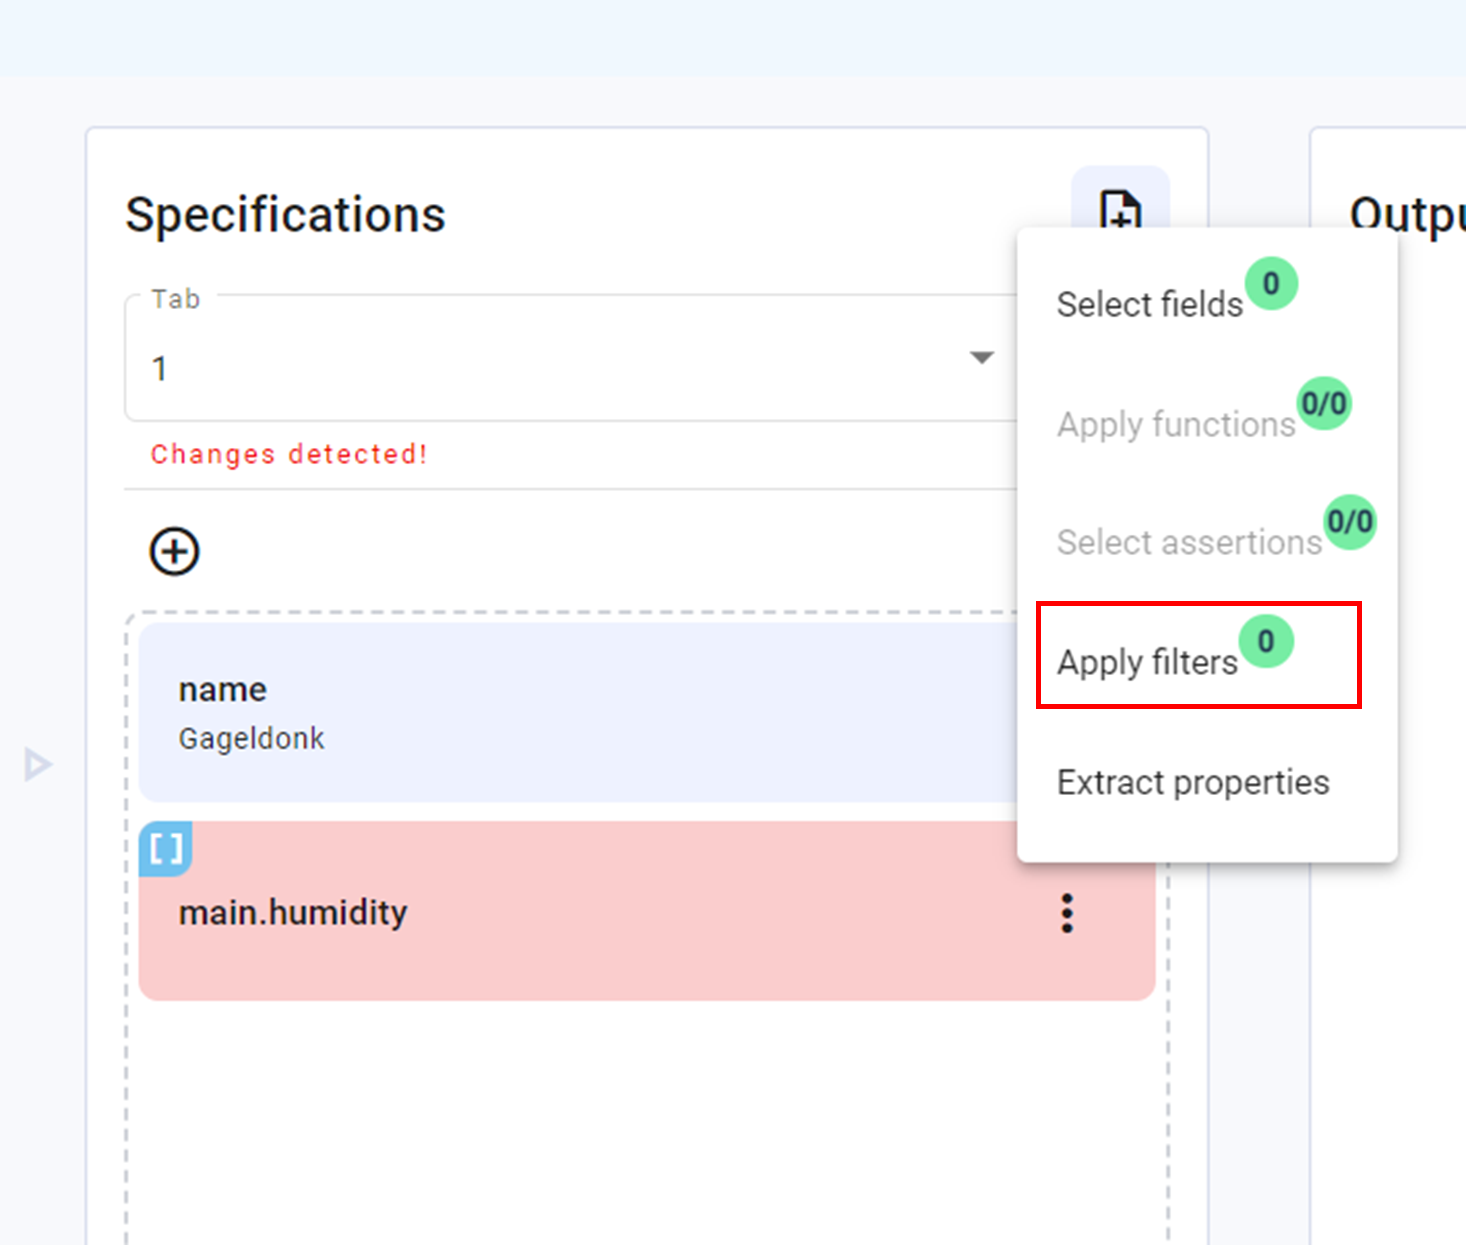
- Click on Apply filters
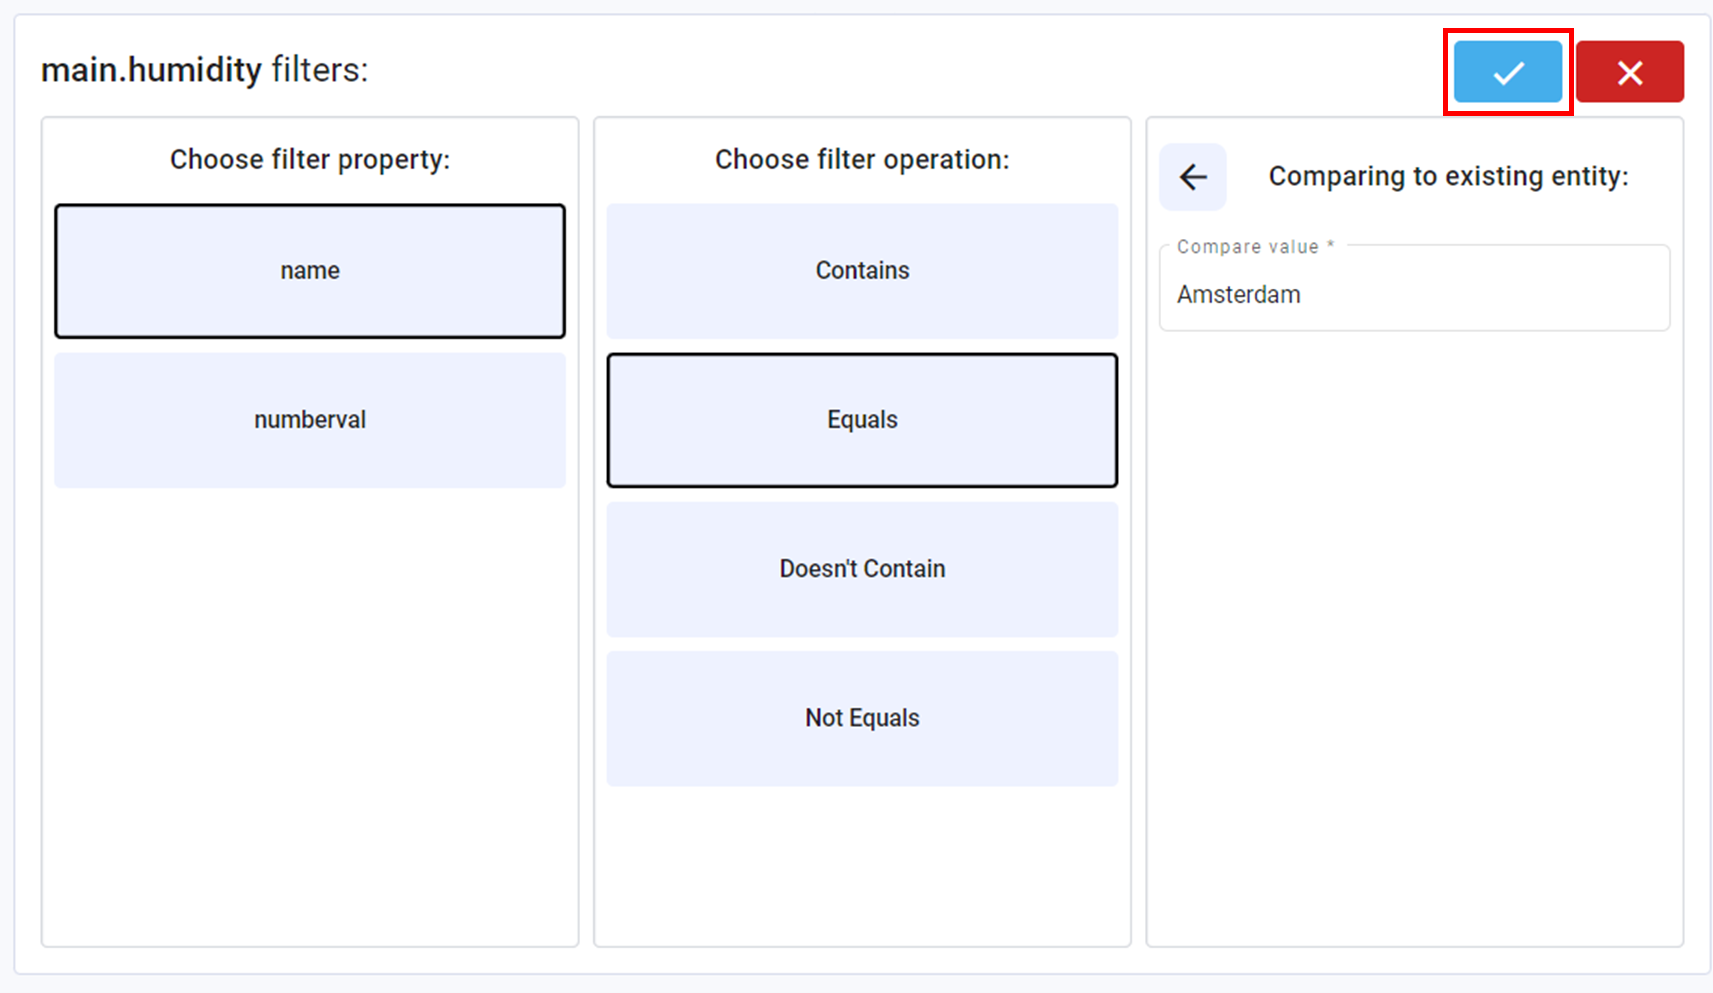
- Choose the property to be filtered on

- Choose the filter operation. (For example, filter property ‘name’ contains “…”, or filter property ‘numberval’ equals “…”)
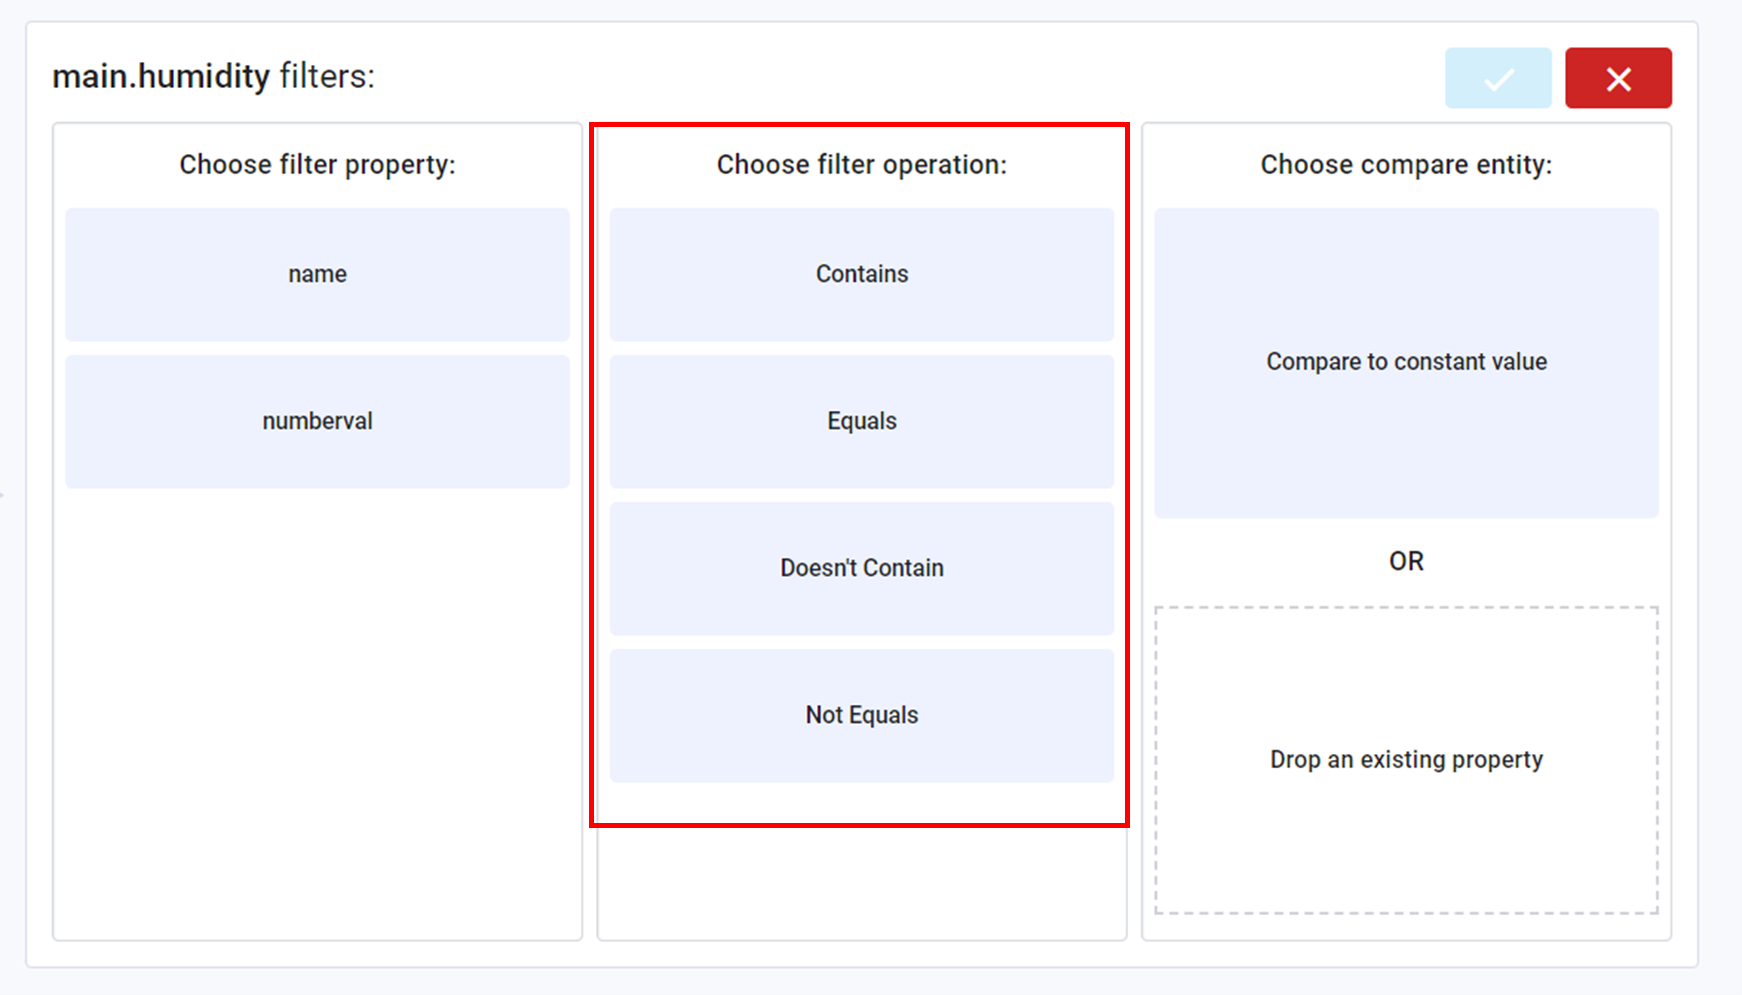
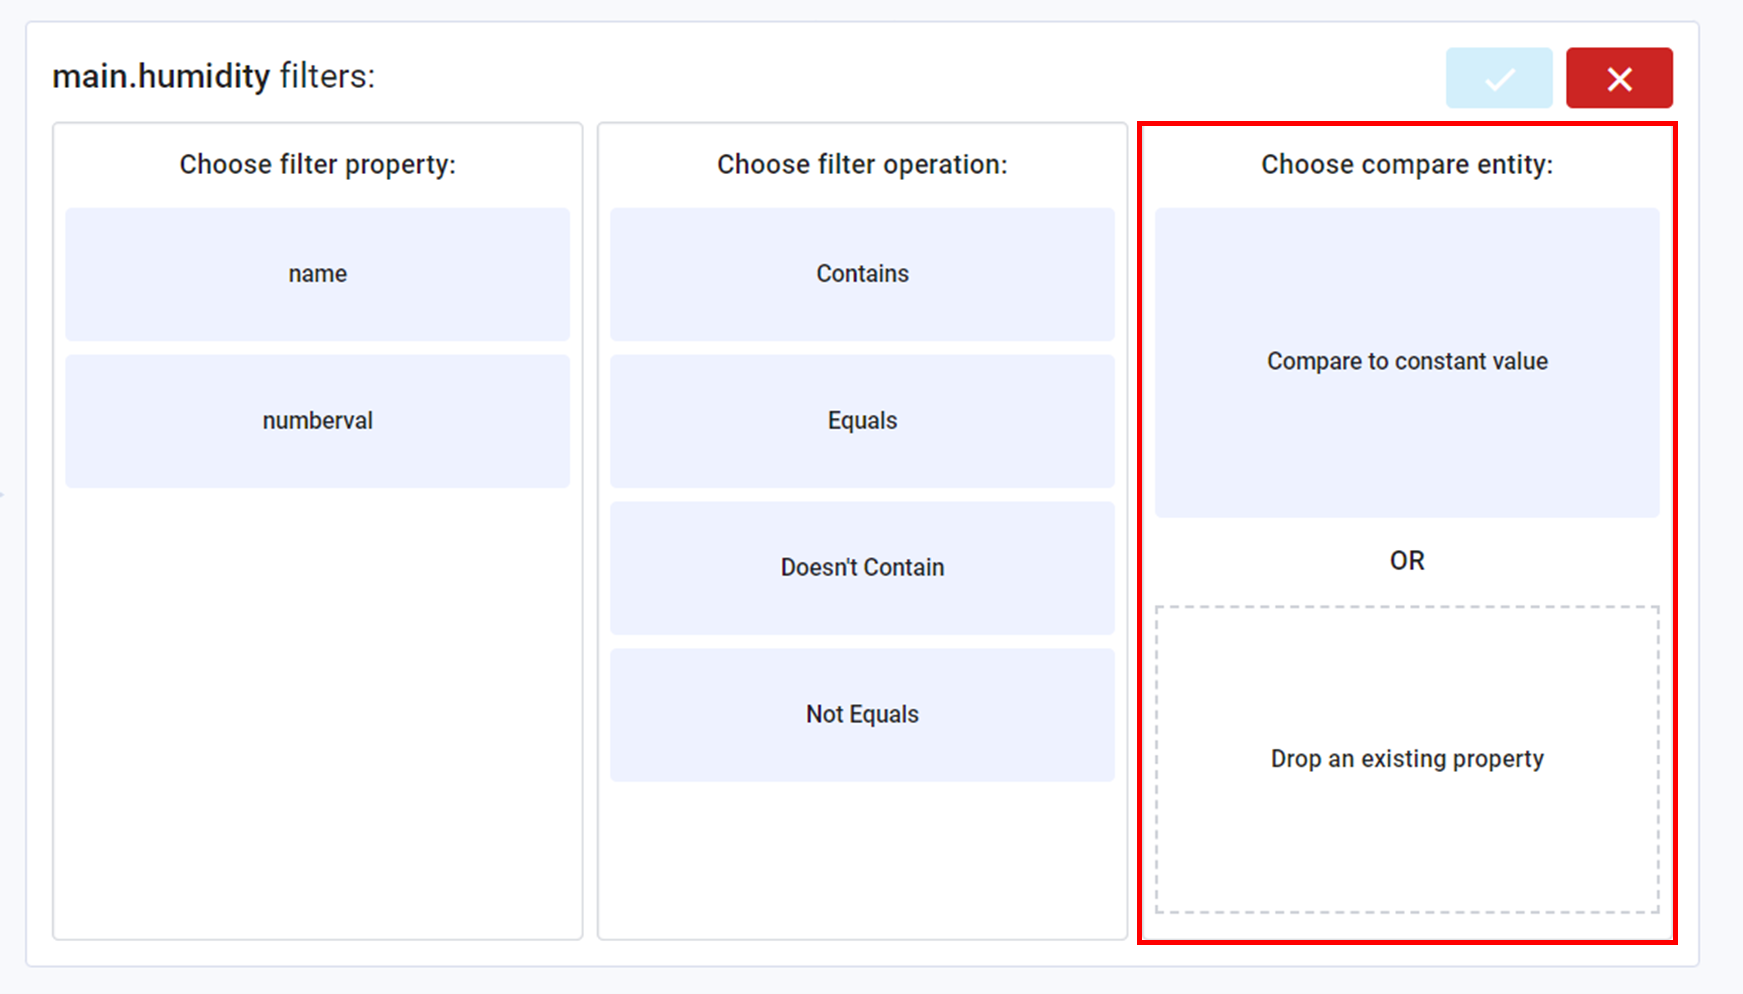
- Choose entity to compare:
- Compare to constant value is a user-defined value that can be inputted.
- Drop an existing property can be used by dropping a property from the Input panel.
- Click the blue checkmark when finished
- Click on the Apply filter button on the top right corner
