Workflow Caching
Workflow Caching allows data from earlier Actions and branched flows to be temporarily stored for later use further down the workflow. This allows later actions to combine retrieved and computed data in order to match the destination data output appropriately.
The data is temporarily stored until the end of the workflow.
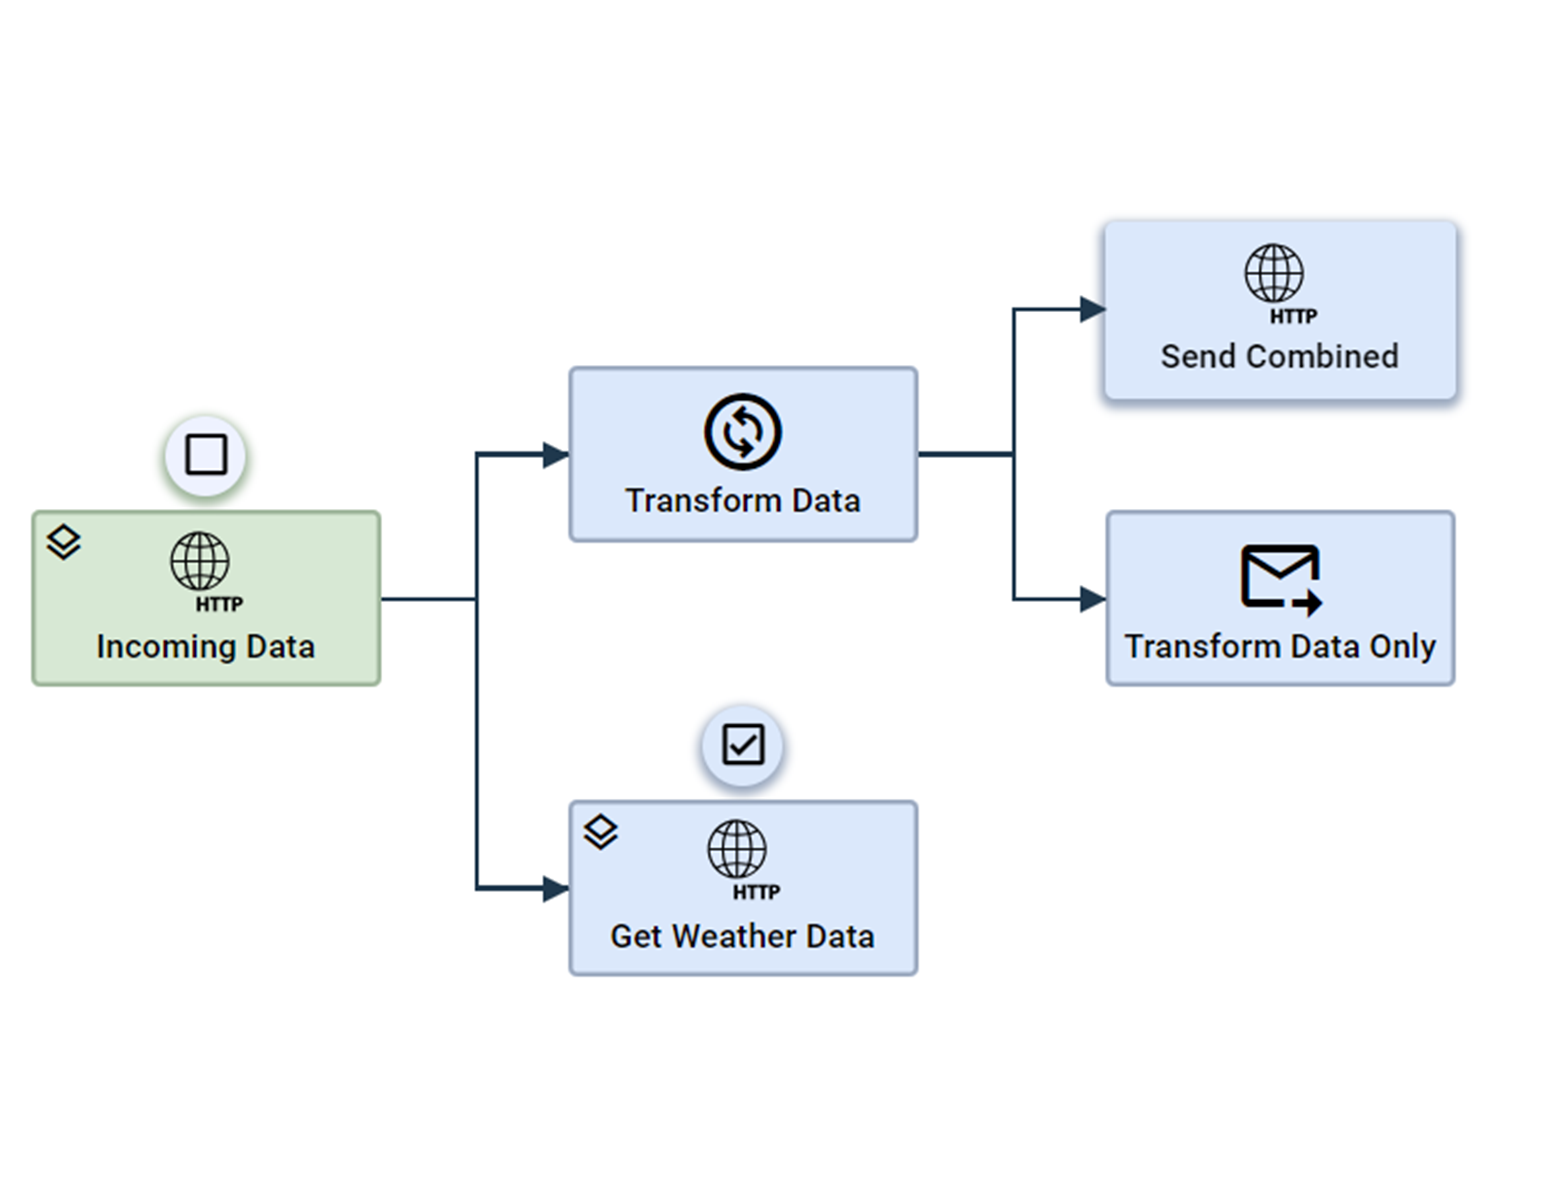
For example, let’s say you want to transform incoming data to your workflow while also retrieving local weather data. Then, you want to combine both data before sending to its destination. By enabling caching in your workflow, you can store the weather data and transformed data until the end of the flow for when it needs to be sent off.
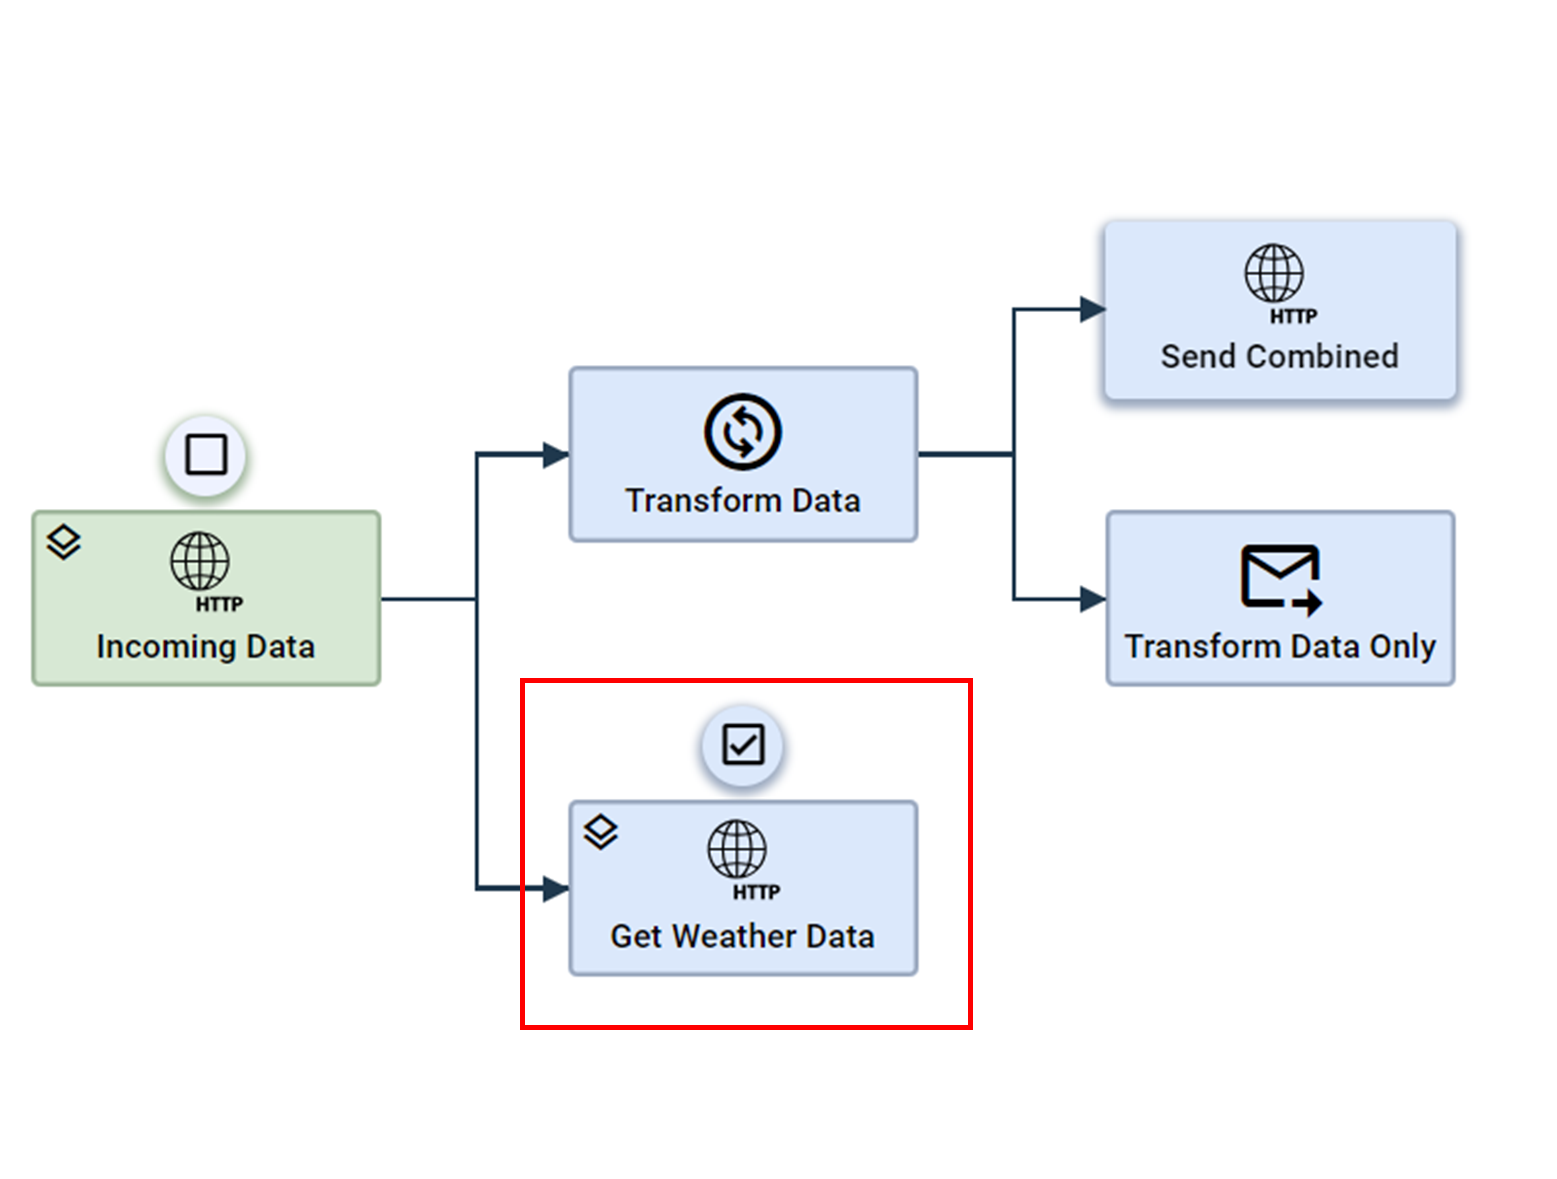
An example workflow of the described use case is seen:
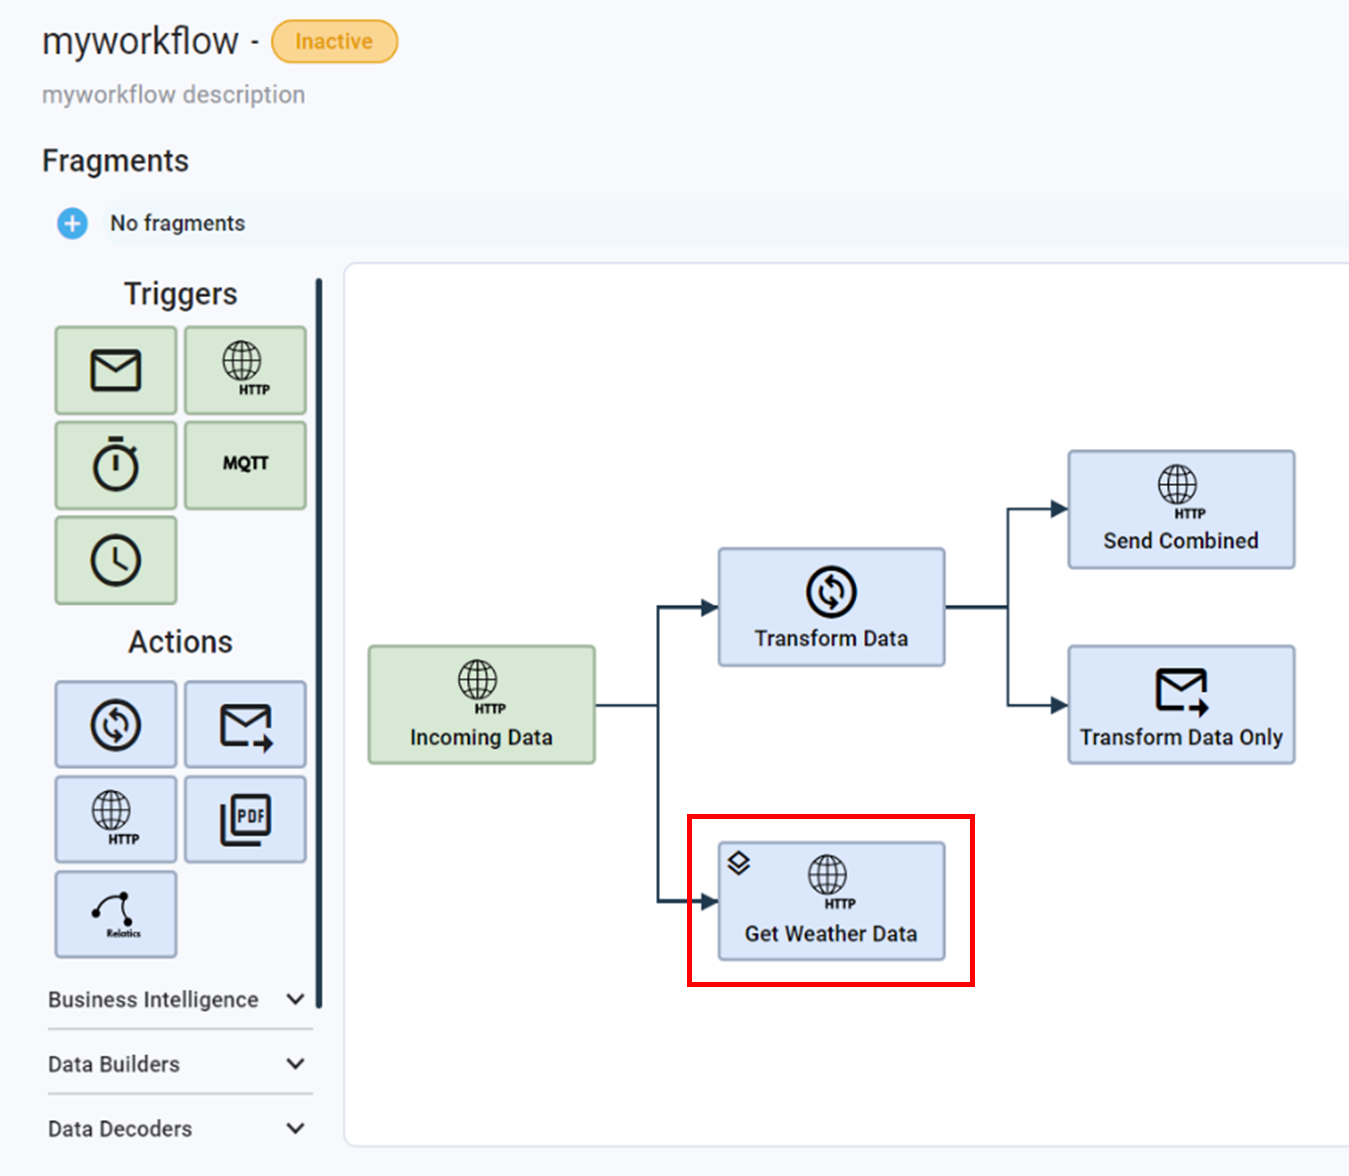
The ‘Get Weather Data’ Action has the caching symbol on the top left corner, which indicates to store the data temporarily. The data can then be used in the ‘Send Combined’ Action at the end of the workflow.
Configure Workflow Caching
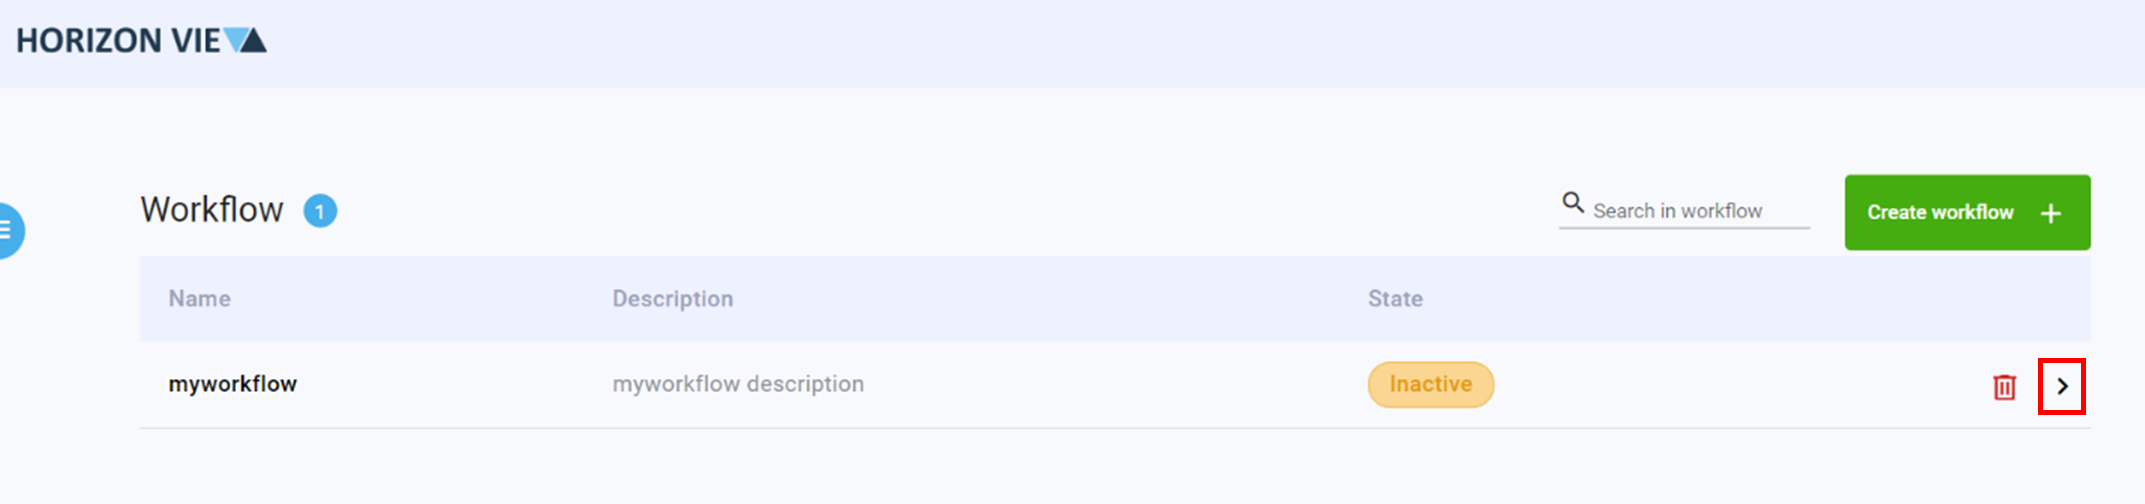
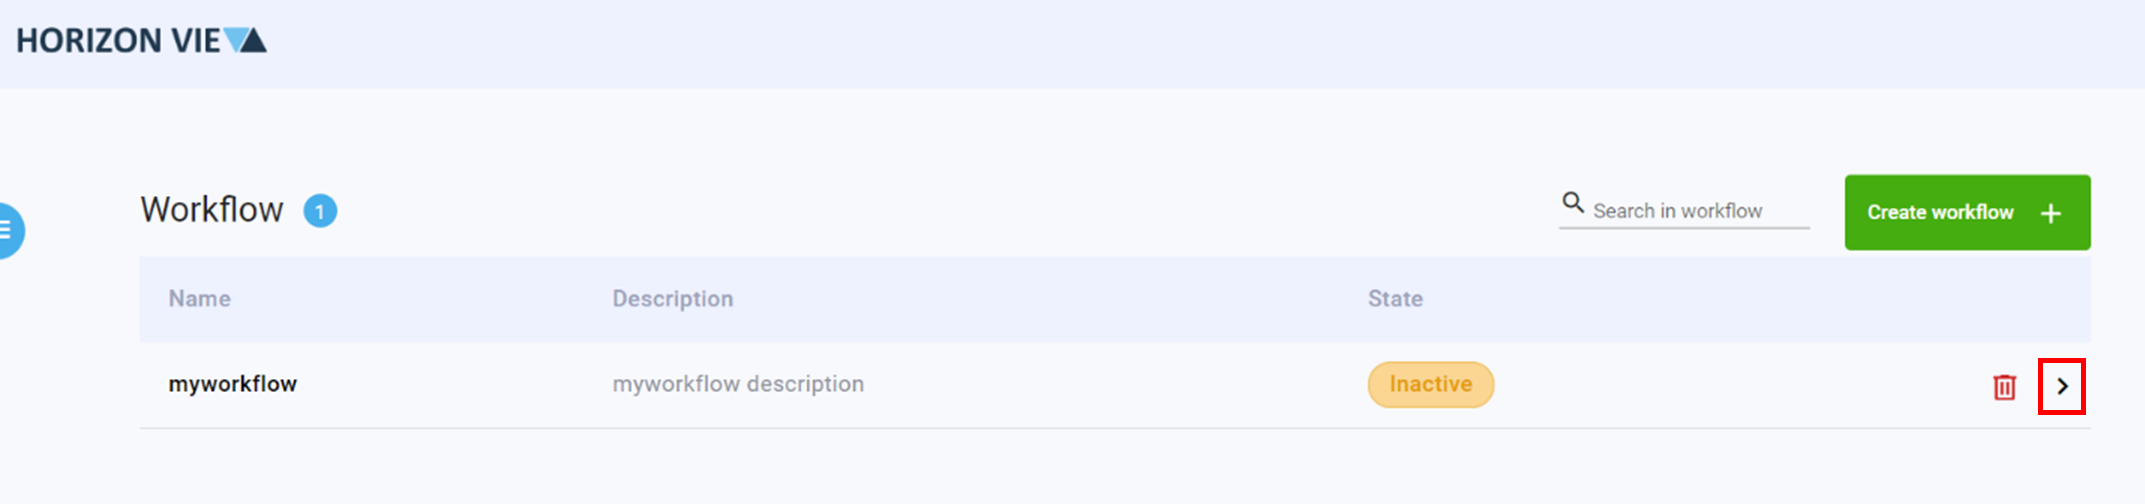
To configure or modify Workflow Caching, enter the ‘Manage Workflows’ page by clicking on the Manage option in the menu screen. [To create a workflow, please see steps ##]
To configure Workflow Caching, you first need to create a workflow. Please refer to the Workflow Basics Guide
- Enter the workflow where Workflow Caching needs to be configured
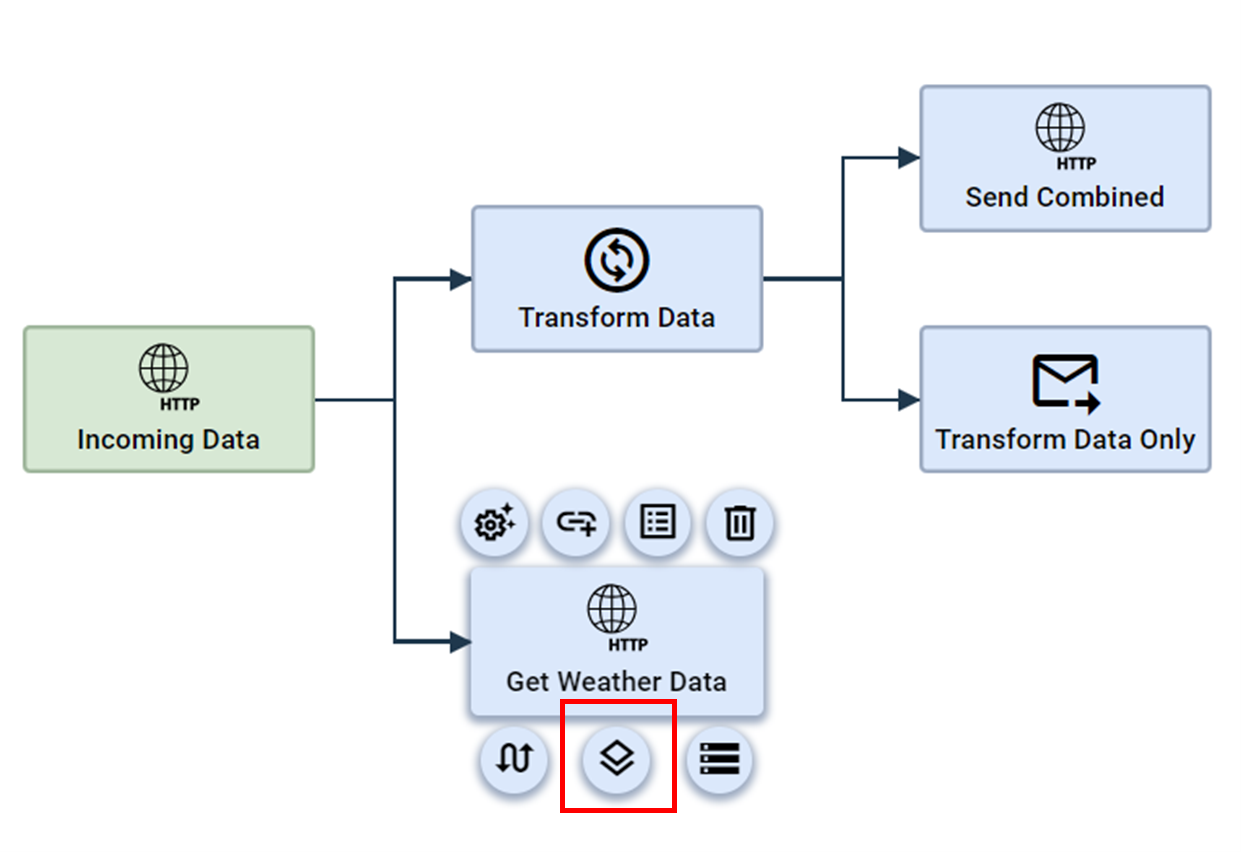
- Click on an Trigger or Action that need to be stored
- Click on the ‘Enable caching’ button
- Repeat steps 2-3 for all required Triggers and Actions to be stored
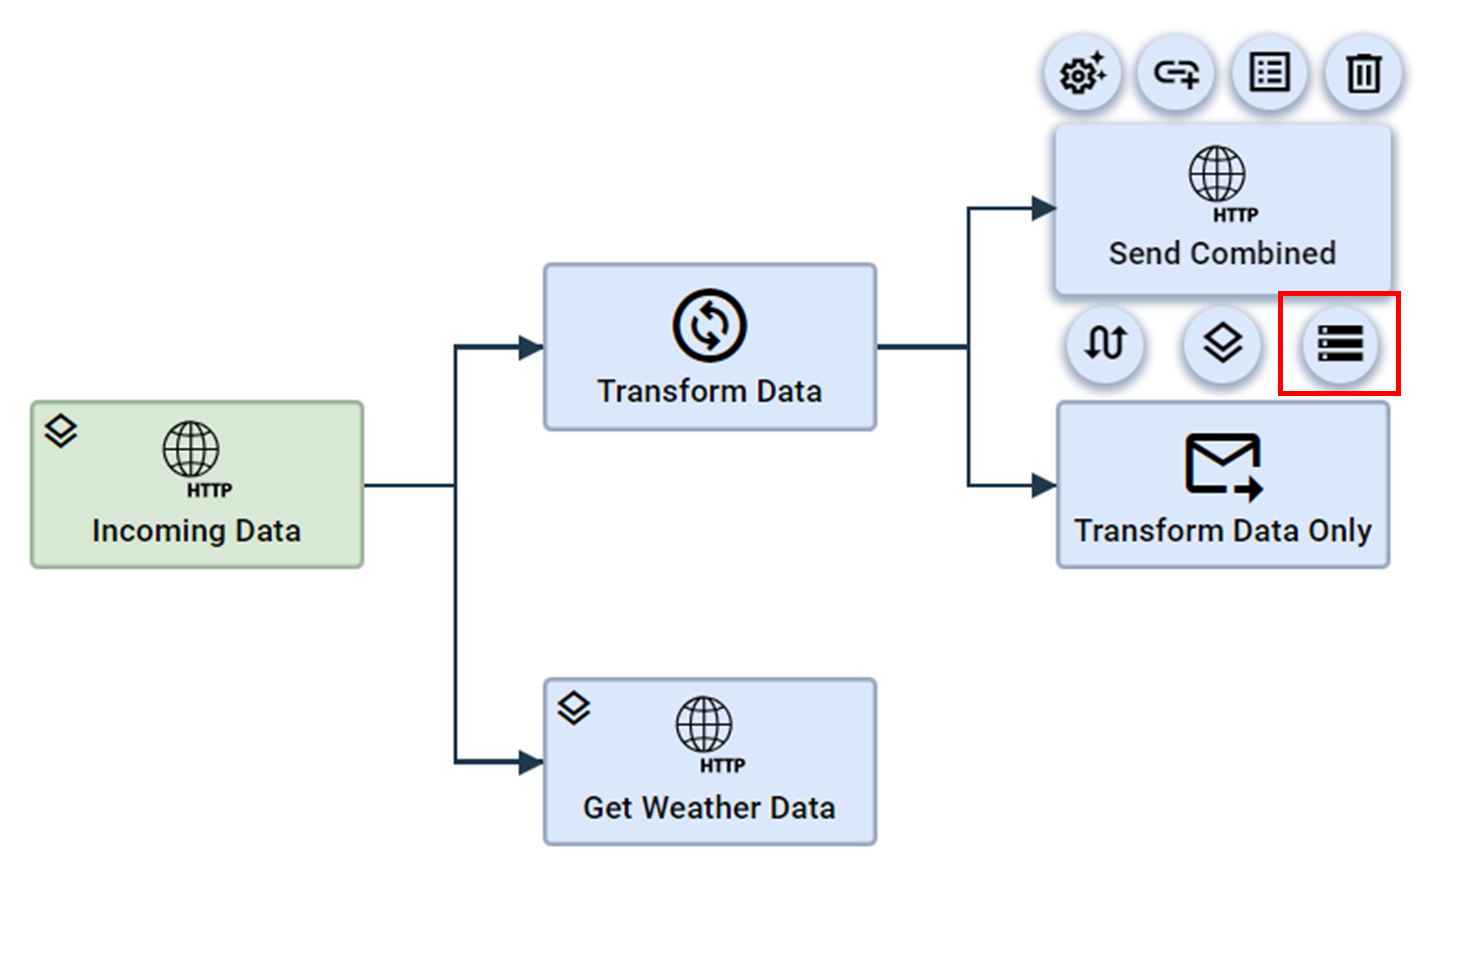
- Click on the Action that requires multiple stored data from different Triggers or Actions
- Click on the ‘Cache input’ button

- Select the required Triggers and Actions
- Click ‘Save selection’ when finished
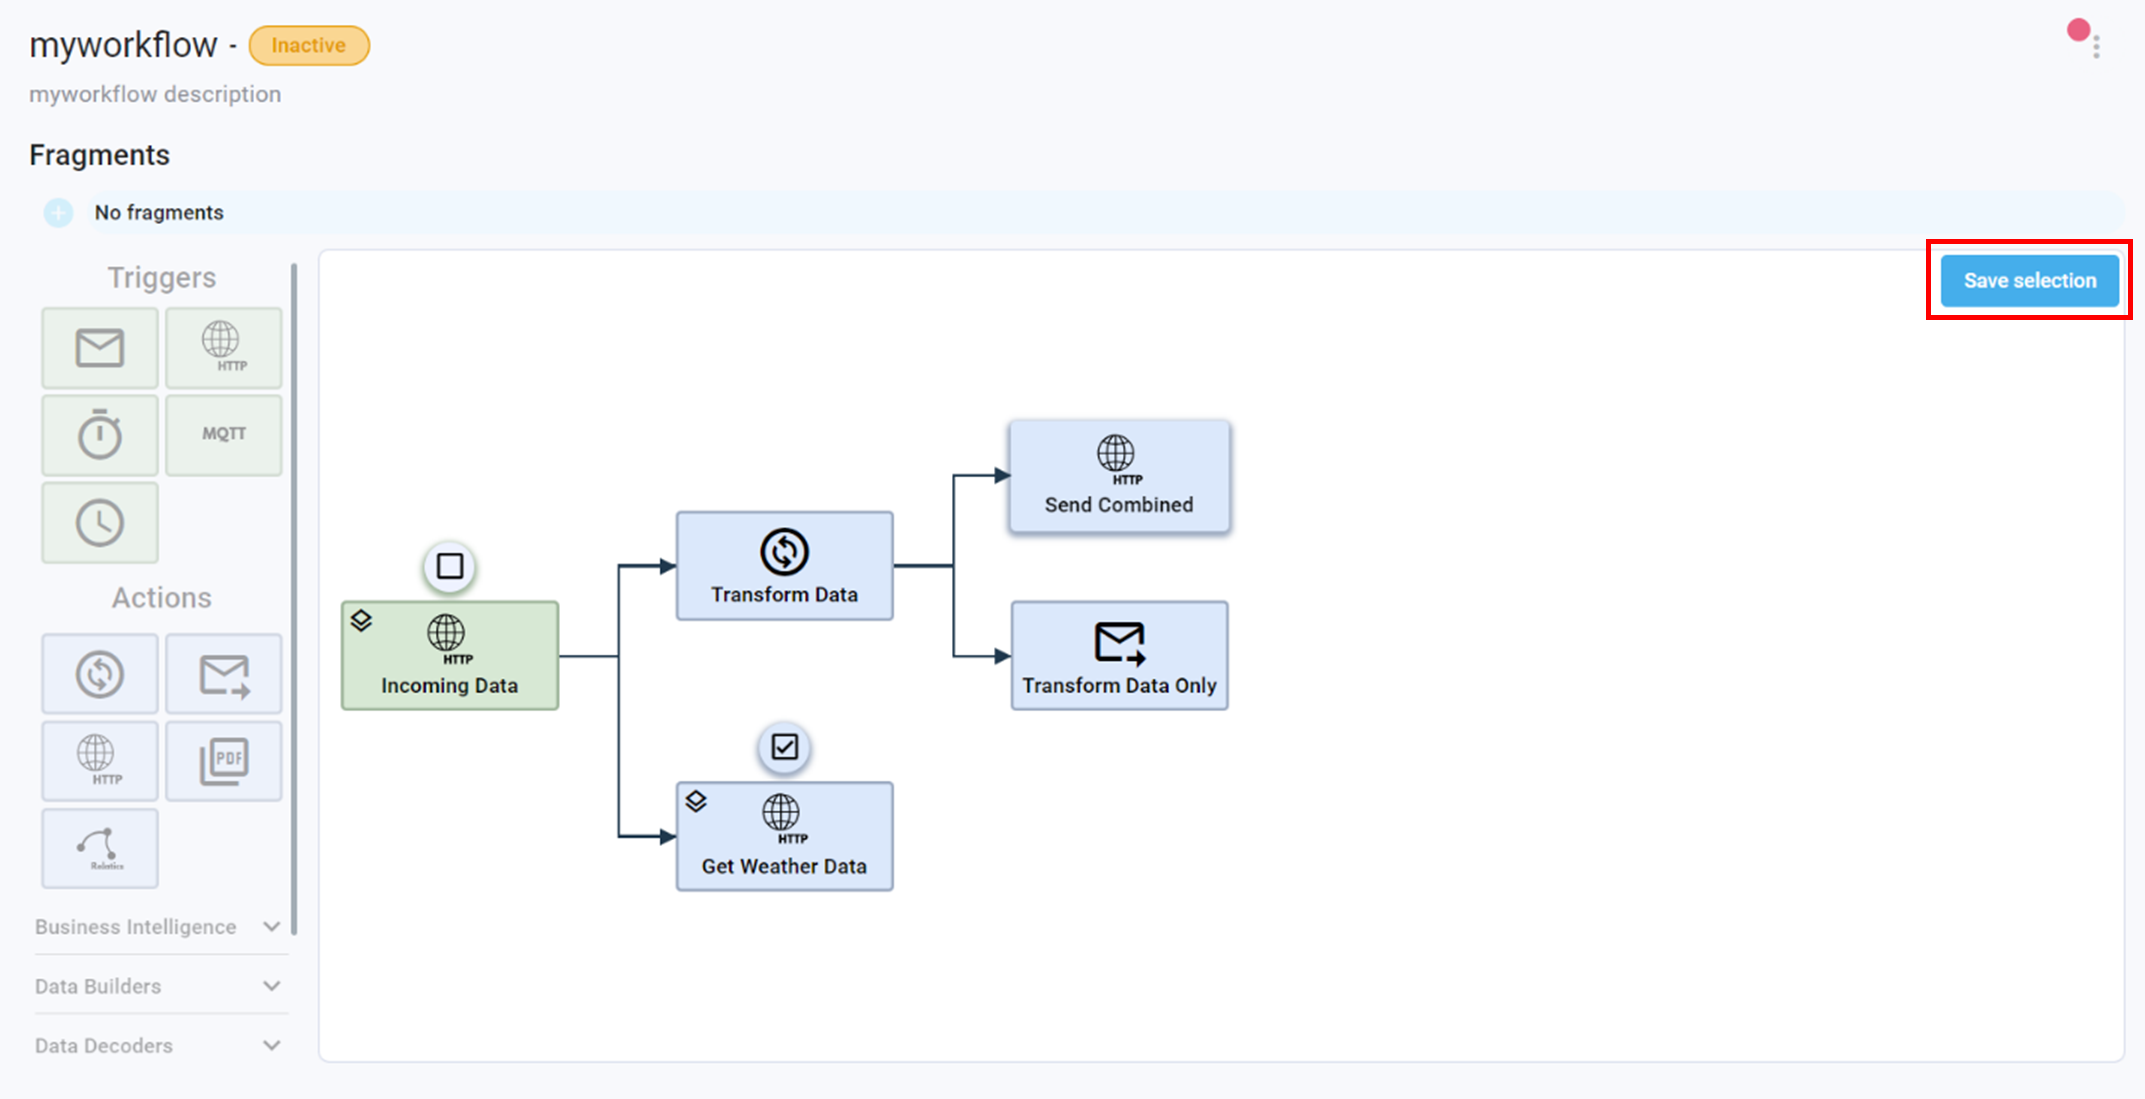
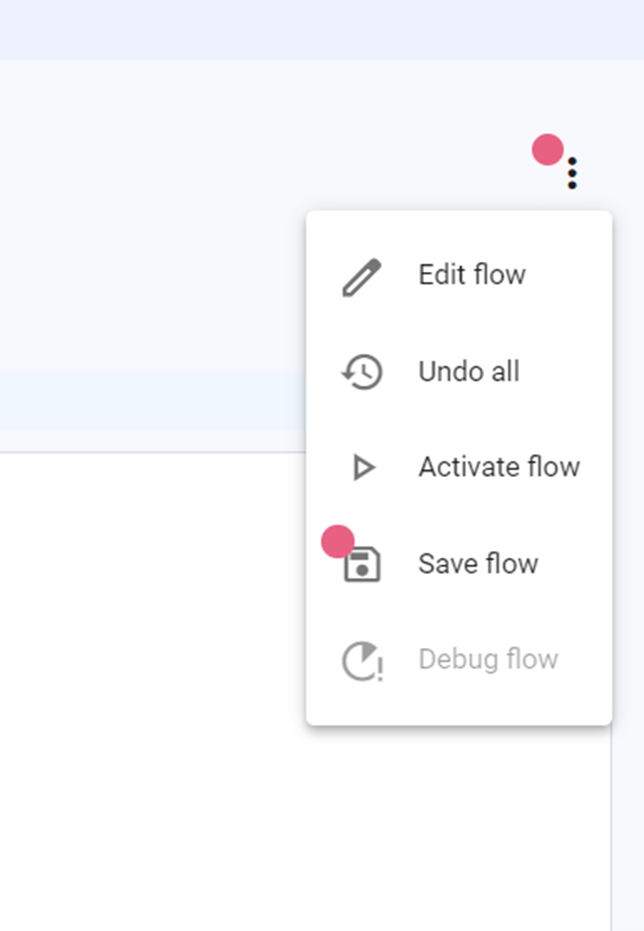
- Click on the three dots on the top right corner
- Click Save flow

Remove Workflow Caching
To remove Workflow Caching, enter the ‘Manage Workflows’ page by clicking on the Manage option in the menu screen.
To configure Workflow Caching, you first need to create a workflow. Please refer to the Workflow Basics Guide
- Enter the workflow where the Workflow Caching needs to be removed
- Click on the Action that has caching enabled
- Click on the ‘Cache input’ button
- De-select the Triggers and Actions that no longer need to be stored
- Click ‘Save selection’ when finished

- Click on the three dots on the top right corner
- Click Save flow